The Bicycle: Its Care and Repair
By C. Von Culin1896149 chapters103 images
Contents
- Von Culin states the book is meant for the rider, dealer and repairman alike, and credits the greater number of the tools, appliances and methods to Wheel Talk, published by Morgan & Wright. He argues proper care saves the manufacturer the expense of free repairs and saves the rider the four to six weeks' wait for a wheel returned to the factory.
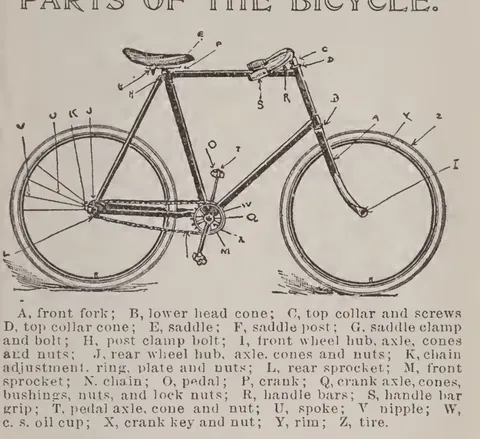
- A keyed diagram lettering every component from A to Z: front fork, lower head cone, top collar and cone, saddle, saddle post and clamp bolt, front and rear hubs with axles, cones and nuts, chain adjustment ring and plate, front and rear sprockets, chain, pedal, crank, crank axle with bushings and lock nuts, handle bars and grips, spoke, nipple, c. s. oil cup, crank key, rim and tire.
- Argues that keeping the nickel bright and the enamel clean is far from all a bicycle needs, and that a rider who knows when the wheel is properly adjusted avoids the inconvenience and expense of returning it to the maker. Explains that "out of order" means one or more parts not exactly right, not a broken machine.
- Advises borrowing an old wheel for the first few days, setting the seat about two inches lower than heel-reach on the down pedal and the bars three or four inches above the seat, then learning on the step on a gentle down grade before slipping into the saddle. Notes the alternative of lowering the saddle until the toes touch on both sides, and that a fall is corrected by steering into it and putting on speed.
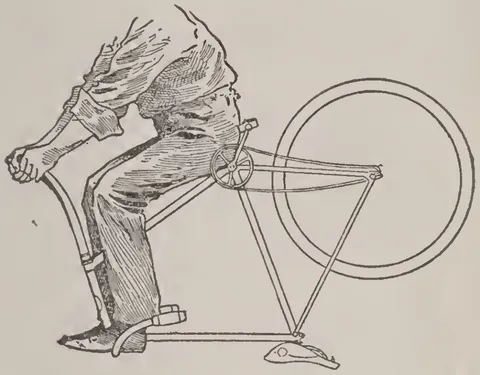
- Condemns scorching with the nose on the handle bar and prescribes an upright position, pushing straight downward with the legs and keeping the arms slightly bent so they act as a buffer against road shock. Warns that the stiff, fully extended arm throws the shoulders back, stretches the neck and sags the chest out of its natural position.
- Warns that the lightest wheel is not always the fastest because lack of rigidity costs more speed than a few extra pounds. Only highest-grade machines can safely be made very light, and beginners are advised to pick a wheel a few pounds heavier than the lightest available.
- A featherweight must be humored: the rider sits lightly, distributing weight between saddle, pedals and handles, lifting the front wheel over a heap of stones and throwing his weight forward to ease the back wheel. Sudden wrenches from deep ruts, over-steep hills and coasting with feet up are all to be avoided, as a featherweight is seldom the same after a severe smash.
- The test for correct adjustment: with a slight pressure of thumb and forefinger you should just detect a very slight side play in the wheel or cranks. If they can be freely shaken the bearings need tightening.
- Explains why spinning a lifted back wheel is a poor comparison between two machines: frame rigidity, chain-wheel alignment under pedal pressure, and the weight of tire and rim all affect it. Contrasts hub-bearing friction, which is enormously increased by the rider's weight, with a leather gear case rubbing the spokes, which is not.
- Coil the chain in a tin box, cover with gasoline, put on a tight-fitting lid and shake for a few minutes, repeating once. Oil, work it in, wipe dry and apply graphite; use kerosene instead of gasoline at night and never work near a light or fire.
- A cold-cement method: grind hard red cement finely, stand it several hours in a large-mouthed bottle covered with benzine, shaking occasionally until dissolved. Clean the rim with a benzine-soaked cloth, brush on a heavy coat, wet the tire's seating face with benzine, fit and inflate hard; keep the bottle corked and away from flame.
- A bicycle lamp should never be allowed to smoke, which is almost invariably caused by turning the wick too high. Regulate the light to a clear, steady flame.
- A short filler epigram: the wheel is the promoter of health, health is the twin sister of beauty, both are closely related to happiness, and happiness is next to heaven.
- Boil the chain in a solution of cyanide of potassium and water, which leaves it as clean as new. The book warns that the solution is very poisonous.
- Remove the oil cups from the crank shaft box and flood the bearings with gasoline while spinning the cranks until it runs through clear and white, then let it evaporate before oiling. Where the oil hole is too small, remove the saddle post and pour kerosene down the frame while rotating the crank shaft and rocking the machine side to side.
- Clean and oil weekly with the wheel inverted on saddle and handle bar, resting on cloth or old carpet. Dust off with a dry brush, use a wet cloth on muddy rims and frame and a small brush on hub and sprocket, rub streaked enamel with cloth or chamois, and keep oily rags off enameled parts.
- An illustrated contrivance giving a riding instructor something to hang on to while acting as a rudder for a novice.
- A notched upright stand for cleaning wheels, adjusting bearings, repairing tires and truing wheels. Extra notches let the wheel be turned upside down, and a single notch holds it while pumping up with a floor pump.
- Slacken the axle nuts, set the cone so the wheel runs a little tight, then gradually tighten the nuts, backing the cones off against the frame until the wheel runs smoothly before tightening the outside nuts. Described as the jam-nut principle, but giving a much finer adjustment.
- An expert in delicate scientific instruments and electric motors reports that after experimenting with many oils for something unaffected by heat or cold yet not too thin, vaseline proved cheapest and best, especially for ball bearings.
- Illustrates that riders usually try to join the chain at point A, over the sprocket, when drawing the ends back to B makes the job easy.
- File around the head of the rivet without filing the head off (A, Fig. 2), then force off the side of the link (B, Fig. 3). Once the additional link is inserted, rivet C can be reused.
- Saddle tilt should follow handle bar height, the nose raised when the bars are well up. If no position is comfortable, invert the wheel and sponge the underside of the leather with hot water and soft soap for a quarter of an hour, then ride twenty minutes over a rough road in old breeches so the leather moulds to the body, and dry in a warm room.
- Rubbing saddle coils are cured by oil or preferably vaseline at the points of contact. A second, louder squeak comes from slight movement of the leather on the saddle framework: invert the wheel and drop oil all round between leather and frame, repeating when the oil dries up.
- The fork should turn easily without rattle or bind, adjusted by the top cone and held by a lock nut, and oiled with the other bearings. Warns that fork collapse is the most dangerous accident short of a collision, and that new wheels often leave the agency with the fork so tight the beginner cannot steer.
- Back the nut off until one full thread shows inside it and, if the key is rusted, apply light oil or turpentine at each end. Use a short tapered punch made from three-eighths-inch brass rod against the threaded end of the key, hold a block of babbitt metal or copper under the crank, and strike a sharp blow with a light hammer.
- For a crank so worn that a new pin will not take up the play: turn the crank axle smooth in the lathe, ream the crank true, then turn a steel plug to drive tight into hole [a] in the crank and braze and forge it to the size of the crank axle. Useful for machines whose cranks are no longer obtainable.
- Front and rear spindles bend because the fork ends are not parallel, the outer face of the fork end is not flat, or the nut is not square and true, so tightening puts a great strain on the spindle. This accounts for a large proportion of otherwise unexplained bent spindles.
- Strip the pedal down to the shaft, leave it on the crank, put a piece of wood under the shaft to absorb the shock and strike carefully in the right direction. If the pedal cannot be dismantled, block under the crank and hit the pedal with a board or stone through a wood pad to avoid battering it.
- To straighten a crank without removing it from the axle, fit two 18-inch wrenches firmly either side of the bend and use them as levers.
- A vise jig made from three pieces of soft brass or copper, half or five-eighths inch square, long enough to span the vise face with two inches bent over the jaws so they cannot fall off. The crank or pedal pin is placed between the three pieces, adjusted to the bend; the threads are not injured and there is no danger of breakage.
- Opens the fault-finding section on the rattles, binding and hard steering that puzzle beginners and year-old riders alike. Starts at the seat: check every bolt and nut, especially the gooseneck or T, then the spring, since stretched leather makes the spring rattle or squeak and the sound often seems to come from the foot of the machine.
- A jingling sound comes from the solder breaking loose where the spokes cross one another, most noticeable when spokes are loose.
- A click often blamed on a broken ball, sand in the bearings or a griping chain is usually just one or more loose spokes. Tighten them while keeping the wheel true rather than tightening the loose ones regardless of the rest.
- Take up the lost motion, or slacken it, until the pedal runs smooth, then secure it with the lock nut or whatever device the make of pedal provides.
- A jogging felt through the feet is a loose crank. Drive the pin in and set the nut tight, or fit a new pin if the cotter is too worn to hold firm.
- A thump is usually a loose sprocket, but a loose chain makes the same noise and jar. Test without dismounting by keeping the feet firm on the pedals and following them round to take up the lost motion; if the noise stops it is the chain.
- Replace a broken ball at once, examining the wheel or crank axle where the noise is, and be careful to return the right number of balls to each side. Warns of balls dropped into the tubing at the factory, found by turning the frame slowly upside down to locate a stray ball, metal chip or lump of loose enamel.
- A loose axle nut lets the front wheel jump out of the fork on rough ground or downhill, bending or breaking the axle and often the fork. Check that the wheels are properly fastened, since a nut that has never been loose may slacken after a year.
- A loose or wrongly placed washer is a puzzling fault. The washer belongs between the cone and the nut, where it stops the cone turning as the nut is tightened.
- Wrap the tools or carry a bag with a pocket for each article so they do not rattle. Adds that the chain should be neither tight nor slack enough to strike the frame.
- Tight bearings are generally caused when tightening the chain, if the cones turn as the nuts are set up. The safe plan is to take the chain off after adjustment, check the bearings, then refit it without loosening the axle.
- A tight head does not make a wheel run steady. The head should be loose enough to turn with the little finger when held off the ground, but not loose enough to rattle or work up and down.
- Pedals tighten when the jam nut works loose and the pedal cone closes on the balls; keep the jam nut tight. Notes that pedals need oil and as a rule get very little.
- Mud and sand picked up after rain or heavy dew grind in the chain and sprockets; wipe both off. Rust from wet also tightens a chain slightly, cured by a drop of oil on each rivet and wiping the chain after turning the wheel a minute.
- The average chain has about 100 joints which stiffen when dry and fail to straighten over the small sprocket, so the chain seems tight. The remedy is a drop of oil at each side of every joint, not the monkey wrench or graphite, stove polish or soap, since it is the oil in the rivets that lubricates.
- A chain that rides up on the sprocket teeth is caused by worn sprockets, too soft metal, worn links and rivets, a poor chain or twisted links. The remedy is new sprockets or a new chain, often both.
- Notes that tires puncture more readily in wet weather, and that even without puncturing they become depressed and show marks and nicks in the gum.
- Sunshine takes the life and elasticity out of thin rubber, so a wheel left half a day in the sun wears its tires faster; oil on the tire is likewise unwise. Where rubber crumbles away and exposes the cover fabric, cover the threads at once with gutta percha or another cement or they will absorb water and rot off.
- Run a little ball round inside the casing on a string, slip the tube end through a wire loop and pull the loop through with the string. The loop is made of No. 8 brass wire soldered at the joint so it cannot cut the tube.
- To repair an inner tube blown out at the end, cement the inside of the tube for about an inch and a half and fold the cemented end back on itself for half an inch.
- Mark the puncture with an indelible pencil the moment it is found and while the tire is still wet, because once dry the hole found in the water tank is lost to view.
- A sketched knot for tying a string to an inner tube when drawing it back into the casing, gripping in three places and holding the tube in a wedge shape instead of a lump that tears the tube and jams in the casing.
- Immerse the part of the casing where the inner tube is stuck in warm water.
- Take the tire off the wheel, deflate it, grasp it in both hands, lift it above the head and bang it down on the floor several times. The tube can usually then be withdrawn without damage to tire, tube or valve.
- When a tube sticks immovably, slit the cover on the side opposite the valve where it lies on the rim so the tube can be removed and replaced easily, then lace the slit up as you would the valve-stem opening.
- Drop just enough gasoline on the old cement to run right round the rim, touch a match to it and let it burn out, then fit the tire at once and pump hard. Makes a good job without the damage to enamel caused by a lamp.
- For inner tubes fitted inside worn single tube tires, fill the casing with gasoline and the tube pulls out without effort. Once the gasoline has evaporated, put a handful of powdered soapstone in the casing and turn the tire until it is thoroughly distributed before replacing the tube.
- For a large cut, take a piece of old casing one size smaller and trim the rubber down to the canvas about a quarter inch back from each end to protect the inner tube from sharp edges. Open the tire at the cut, slip the piece in, thread the tube through and sew up.
- Unscrew the cap and press down on the plunger so the escaping air blows out loose dust and dirt around the valve, dirt adhering to the valve being a common cause of leaks.
- The smallest contact between air and tire fabric means escaping air. Blame usually falls on the valve, but more often it is careless cementing of the tire to the rim, which lets the tire creep and chafes the valve; saw-edged valve-stem holes in wood rims and rough handling of valves contribute.
- A common corset or shoe string makes a splendid tire lace: handy, cheap, strong and pliable, and needing no needle.
- The method used in Morgan & Wright's repair shops, with two short pieces of slotted brass tubing. One tube end is pulled through and turned back an inch, the other about two inches and then turned back on itself; both are cemented, pressed together until dry, and the slotted brass tubes slipped off. Works for splicing as well as telescoping.
- Where the valve stem is cut by friction on the rim edge, deflate, fill the cut thoroughly with liquid cement and bind stem and cut with small rubber bands passed round two or three times so they squeeze into the cut, covering at least a quarter inch each side.
- Riders and repairmen who return a patched tube to the cover without soapstone or chalk make it impossible to remove next time. Use soapstone freely around patches; even fine road dust is better than nothing.
- In thorn and cactus country, snap the thorn off flush with the tire rather than extracting it, so the air is retained and the tire carries the rider home. Also notes the lap in the outer casing, where the canvas ends join, works loose when a tire is ridden flabby.
- Clean the machine thoroughly, rub vaseline or gun grease over all bright parts and flush the bearings with oil. Clean the tires and invert the machine on handle bar and saddle so no weight rests on them, or better use a bicycle stand or suspend the wheel from the ceiling.
- Two soft pine boards five feet long, notched at a, a, a, a to take the tubing and prevent it collapsing, are placed one inside and one outside the frame near the steering head and the other reversed near the sprocket and saddle post. The frame is pulled straight, sighting through until the steering head is parallel with the seat post, without damage to frame or finish.
- Turpentine is a never failing laxative for a screwed-on sprocket or any other screw, and the parts should be warmed when possible.
- Uses three grooved poplar or pine blocks, one three inches and two two inches square, and two common clamps laid out on a table. Clamp the frame near the bend between two blocks and draw down with the second clamp until straight.
- A gauge board of one-inch stock, five inches wide and three feet long, mortised for the extended parts, for truing front forks bent backward. Lining the face off as shown in the diagram also makes it handy for forks bent sideways.
- Prove crown and stem square first; if not, bend the stem over a stout bar in the bench vise using the forks as a lever. Then grip the stem in the vise and pull the fork sides into line, turning a quarter turn to correct the other plane, keeping points A and B equidistant from the centre line and curve C the same on each side.
- Rest the bottom bracket clear of the floor, hold a chalk crayon near the rim resting on the lower base, revolve the wheel and set up the spokes where the chalk marks. Rub off the marks and repeat until the chalk takes evenly all round the rim.
- For sideways bends, invert the wheel, remove the front wheel, straddle the machine sitting on the sprocket wheel with feet on the bars, and push each fork blade forward in turn until it lines up with the head. Badly bent crowns or blades are heated; a stiff fork is clamped in cloth-bushed vise jaws with a long steel rod thrust down the stem and a wrench applied over a leather pad.
- Set the machine on a box as shown, with an assistant holding the rear wheel down, and pull forward easily on the front wheel at A to bring the forks back to position. If one blade is bent farther back, turn the front wheel slightly toward that side; pump the tires hard so the box edges do not injure the rims.
- Grip the ends of the crank shaft firmly in the bench vise and lay a three-foot straight-edge along the outside of the large sprocket, then pull or shove on the rear forks until the rear sprocket is in perfect alignment.
- For wheels out of line because both top and bottom bars are thrown over: grip the crank shaft ends very firmly in the bench vise, line up the sprockets first, then bring the front wheel into line with the rear, proving it with a six or seven foot straight-edge that should touch points 1, 2, 3 and 4 at the same time.
- Clamp two blocks face to face in the vise, place a bit the size of the tubing at the centre of the joint between them and bore through, producing matched half-round blocks.
- For misalignment caused by a twist in the frame, remove the forks, grip a steel bar about 15 inches long upright in the vise and slide the steering head shield over it. Put a hardwood stick about 1.5 by 2 inches and four feet long upright through the frame near the pillar post and twist until head shield and pillar post line up.
- A cheap shop-made tool: a reversible clamp with a half-round block on the screw end for short in-bends in rear forks, and a long wood block 1.5 inches square and 18 inches long, slightly curved end to end to let the tubing spring back. Soft wood blocks the size of the tube go in the clamp, and half-by-three-inch flat iron bent to fit 1.25-inch tubing and lined with leather on the long block.
- Two brass pieces (AA) formed to the vise jaws with new hard leather belting (bb) riveted on. Take short grips on the kinks, then revolve the tubing in the leather grips to give a polished finish; the leather must be at least three-eighths inch thick to form a circle round the tube.
- Remove the grips, fill the bar with sand pounded hard, plug both ends with tapered metal plugs, and heat over gas or gasoline to bright cherry red. Clamp in sheet-brass vise jaws and bend with a piece of tubing as a lever; also describes an eccentric-action bending wrench of two grooved brass castings, and finishing with rotten stone and oil then Vienna lime or rouge.
- Fill the bar with melted resin or lead, the author preferring lead, with the bar warm while filling. The bending form is a hardwood plank two inches thick and twelve wide fixed floor to ceiling, bored with a one-inch hole 30 inches up for short bends, and fitted with four two-inch, two four-inch and two six-inch pulleys bolted two feet from the floor for long bends and changing the drop.
- When driving out a sticky crank pin, support the crank on an anvil, oil the key, and use a heavy hammer against a short stiff piece of brass held on the key. Many keys are spoiled by using too light a hammer, which upsets the end of the key.
- A screw tool of best tool steel that avoids the battered threads and broken cones so often caused by hammer or mallet, and can force a key in as well as out. The screw end is bored out with a small cup-shaped brass plug to stop it slipping off.
- Drill a half-inch hole through a brass or copper block 1.5 inches in diameter [c] and bend a piece of sheet brass to fit the vise jaw [d]. Place the threaded end of the key against plate D and block c on the opposite side of the crank sleeve, then tighten the vise quickly; reverse the operation to replace the pin.
- Where balls will not stay in the cups until the cover is secured, daub vaseline in the ball cup and drop the balls in; the vaseline holds them in place. The page adds that a pipe cutter is far better than a file for cutting handle bars.
- Take a firm grip on the crank in the vise, using copper clamps, and drive the axle out with a long centre punch.
- Ordinary cranks can be straightened while still on the shaft by gripping the crank shaft endwise in the bench vise, removing the pedals and using a large monkey wrench as a bender on the small end of the crank.
- Space and mark the new rim as in Fig. 1, and make a cross-marked stick (Fig. 2) on which H1 and H2 are the hub width apart and H2 to X2 is the flange diameter. Set the stick across the rim centre, drill each hole in turn with a twist drill in the lathe, countersinking for washers, without turning the stick over once started.
- A truing device made of 1.25 by half-inch iron, the lower part 8 inches, the rising part 3 inches and the upper part 17 inches long, fastened to the bench edge with a heavy screw and held up in use by a pin in the end.
- The crack in wood-rim wheels that sounds like a broken ball is caused by loose spokes. Grasp the tire with both hands, pull hard on the wheel and turn it at the same time, and the trouble will display itself.
- A stand 20 inches wide at the end with sides 8 feet long running to a point, to which the bicycle is fastened with straps.
- A short moral piece arguing that the best wheelman is the one most mindful of the rights of others, not the most reckless in his own enjoyment.
- Observes that a capable road cyclist may be unable to negotiate a modern cycle track, and a first-class racer unable to thread a crowded city street; each is an expert in his own way.
- Describes the A. Dudley Mfg. Co. balancer and repair stand of Menominee, Mich., with attachments for gauging the periphery and side lines of the rim. It is portable, needs no fastening down, balances any wheel from 24 to 30 inches, and its brass and steel nickel-plated gauge adjusts in every direction.
- A shop water trough for testing tubes and valves: two boards 9 by 16 inches for a stand carrying a flaring trough 24 inches long, 16 inches across the top and 10 across the bottom. Tire cement poured in the joints makes it watertight, and a three-quarter-inch gas pipe with a valve drains it through the floor.
- A cheap forge for small work: an 18-inch sheet iron pan 4 or 5 inches deep on three or four wrought iron legs screwed to the floor near a gas connection, with a fan blower close by. The burner tube is three-quarter-inch gas pipe drilled with a row of 3-16-inch holes underneath, and two tubes side by side turn the blaze inward, giving a clear blue flame that does not burn nickel.
- Argues that only a very slight degree of heat, barely more than the fingers can bear, is needed to expand the outer piece, and everything beyond that is objectionable since both parts inevitably rise in temperature. Raising the outer piece to cherry red, as sometimes advised in print, would injure the adjacent cups and probably the plating for no gain.
- A hardwood gauge: A is 1.25 by 1.25 by 29 inches, B is three-quarters by 3 by 10 inches, D three-quarters by 2 by 6 inches and F three-quarters by 2 by 8 inches, with iron pieces E and G screwed to the edges and a divided brass slide C set into B. Rest the neck against E and G with the fork ends over slide C, reverse the fork, and move the slide half the difference to find true centre before bending.
- For frames bent sideways without removing wheels or front forks: line up the sprocket wheels, bolt the rear wheel fast to the rear forks, lay the frame across a soft stick notched to receive it near the hanger and seat lug, and bend until the wheels are in line. A quick method that saves the time and expense of removing and re-lining the wheels.
- Put a lever in the wheel seat and pry over a stick placed just in front of the braces A and B; making the fulcrum at that point prevents the joints being broken.
- Lay the frame on blocks as sketched, have a person stand on one end of a broomstick and roll it gently back and forth until the frame is straight. If the tube flattens, turn it the other way up and roll until it is back in shape.
- Drive a polished, slightly hardened steel bar about 12 inches long that exactly fits inside the tube, working over a notched wood block on an anvil to prevent jamming at the upright joint. Twist the bar out in a vise; on a badly kinked tube drive a short piece of tubing inside afterwards, and treat a hollow seat post the same way.
- Introduces formulae furnished by Mr. G. A. Suverkrop, mechanical engineer of Camden, N. J., who vouches that he has used them all. He opens on brazing with the complaint that so many repairmen use whatever spelter they can buy without knowing whether it suits the job.
- The best spelter is the silver solder used by scientific instrument makers, almost a necessity for light racing frames because its low melting point makes the joint before the tube scales. Gives the silver solder formula (fine silver 19 dwts., copper 1 dwt., brass wire 2 dwts. melted under powdered charcoal), a cheaper copper-and-zinc mix, and a stronger copper 32, zinc 29, tin 1 spelter.
- Borax sets very hard on cooling and is conducive to bad language and spoiled files, so a better flux is one pound of powdered borax with one pound of powdered bicarbonate of soda. Dipping the still red-hot job in soapy water makes the scale fall off, leaving the steel and brass clean.
- Brazing without heat, a method hardly known outside Birmingham, England, suited to steel and iron: half an ounce of fluoric (hydrofluoric) acid with 2 oz. brass filings and 1 oz. steel filings. Touch each part with the mixture and put them together to set, keeping the mixture in an earthen vessel because fluoric acid dissolves glass.
- Pound and sift together ammonia, common salt and calcined tartar one ounce each with three ounces of antimony, wrap in linen enclosed in an inch of Fuller's earth, dry, and heat slowly in a covered crucible before cooling and grinding to a fine powder. The page ends with an asbestos funnel about 12 inches high placed over the forge fire for brazing frames as well as a blow pipe.
- Where tubes are dented or crushed beyond looking well, take out the small rivets at the joints, unbraze and remove the tube entirely, then drive a mandrel of the right size through it. A small lengthwise check can be remedied by melting a little brass on the tube before brazing it back in place.
- Heat the tube nearly red in a clear blaze, allow it to cool, rub bright with clean emery paper, then rub with borax paste and it is ready to braze.
- Clean the tube ends thoroughly with emery cloth, clean the inside with cotton waste, and take the frays off the ends with emery.
- For open or loose joints that cannot conveniently be charged with spelter and borax, use a 3-16 high brass rod about two feet long, heating the end and applying borax in the usual way. Hold the rod on the joint at the proper heat until enough brass has melted to fill it.
- After soft-soldering nickel-plated or plain steel spokes, apply common baking soda dissolved in rain water.
- A furnace charging the blast with vapour that burns as well as gas, using a five-gallon oil can as tank G with the blast entering near the bottom and leaving at the top. The gas is forced through the pipe to burner B; a tight joint at A keeps the blast out of the burner, the flame from B at C lights the gas issuing at D.
- A sketch of a padded repair table, described as self-explanatory.
- A small screw press useful for straightening bent forks with suitable wood blocks, bent cranks and similar work. It screws into the vise or attaches to the bench, has a base 10 inches long and 4 wide with 4 inches between base and screw end at its highest point, and weighs about thirty pounds.
- George S. Perkins of Great Falls, Mont., describes a furnace working with kerosene, gasoline or benzine, using 15 pounds pressure for gasoline and 20 to 25 for kerosene from any floor pump. It cost him $10.00 in materials, listed in detail down to the elbows, tee, reducer, globe valve and steam gauge, with lead-filled generating coils wound on a 1.25-inch mandrel and 3-64 inch vents.
- A long treatise on the art: the few requisite appliances (a forge, spelter, borax and as few files as possible), the granulated and wire forms of solder, and the role of borax as flux in protecting the metal and keeping it clean. Covers mixing spelter and borax in about equal proportions, joint tightness and grooving, inserting a one-inch tube fully an inch into the lug, pinning with wire, gas versus gasoline heat, inside and outside brazing with wire or spoon, and using copper rather than brass for malleable iron to steel.
- J. W. Cooper of Moline, Ill. details an oven any tinner can make, 8 inches thick by 4 feet long and 3 feet high in No. 20 black iron, with wired flanges, box-beaded doors held shut by a one-inch gas pipe in the lugs, and a flame spreader over the 6-inch hole in the bottom. Covered with three thicknesses of asbestos paper and heated by a gasoline stove made from a 6-quart tin pan, it hardens enamel in two hours at 300 degrees.
- W. Hafer of Augusta, Ky. builds his from an ordinary cannon stove with the top removed, a boiler plate bottom holed to fit the stove top, and an outer jacket. The No. 22 iron oven sits 4 inches inside the jacket on legs, with a stove pipe hole in the jacket top and two 4-inch doors taking the whole front; the oven must be tight to keep smoke out.
- Drill a small hole from ten to sixteen Birmingham wire gauge according to the dent, tap a thread, screw in a tool steel plug protruding about 1.5 inches and pull the dent back with a hand vise, then replace the plug with soft iron and touch up with liquid enamel. Two alternatives follow: a No. 60 hole opposite the dent with a round-faced punch, and heating the dent and hooking it out with a bent spoke.
- Clean the wheel as soon as possible after a shower, drying the nickel work by fire or sun before damp develops rust spots on the best of plating. Keep dust and sand off the chain, clean the bearings at once if a gritty sound is heard, and slacken the chain and use plenty of oil in rain and mud to help prevent a bent rear fork.
- A caution attached to the Birmingham brazing method: the fumes of fluoric or hydrofluoric acid deal out death to all animal life, so the utmost care must be taken in handling it even in quarter-ounce lots.
- Brush a finished joint with a metal brush rather than a file, which injures the tubing and ruins the file, and avoid pickling since acid attacks the joint and the tubing as well as the superfluous spelter. Apply no more heat than necessary, protect nearby screw threads with black lead or graphite in preference to clay, and note that boracic acid and other substitutes for borax exist but borax is cheap and proven.
- Closes the brazing series: solidity in a joint results from perfect union only, and these instructions will put any repairman on his feet, the rest being gained from experience.
- R. R. Walker of Parsons, Kan. describes a boiler-iron tank holding about five gallons and standing 150 pounds pressure, fitted with air pump, steam gauge and filling plug, connected by half-inch pipe and valve six feet away. A coil of pipe four inches long serves as generator and burner, burning downward on a small cast iron block; half full of gasoline at fifty pounds it melts brass in a few minutes.
- Illustrated instructions for the needle-plug and nozzle repair outfit: screw the needle-plug fully home before inserting, inflate to riding pressure first, and check for a strong hiss on unscrewing the needle to confirm the nozzle has entered the inner tube. Fill the cup completely with cement, force it directly upward so the patch falls evenly round the puncture, spread it with the thumb and test by wetting the spot.
- A device for holding a tire while removing the tube: take a steel rim, cut a piece away and bend it slightly at the ends, rivet on two bases AA and screw it to a convenient post in the shop.
- Morgan & Wright's terms, dated January 1896: they repair all tires of their manufacture free of charge and replace defective parts at their judgment, but not when worn out in service or injured by accident. Requests go direct to them with express prepaid, the wheel is not to be sent with the tire, and genuine tires carry the firm name and patent dates in raised letters on the side.
- Inflate and immerse valve and stem in a bottle or glass of water, noting where bubbles start to distinguish a leak through the valve, between valve and stem, or through the stem. Pump a few drops of water through a leaking valve, or cut the string and fit a new plunger or washer; do not try to fix a leaky stem but remove it with benzine or a warm iron and cement on a new one.
- Let some air out of the tire, wrap the tape tight, then inflate. Tape wrapped while the tire is hard never sticks so well.
- Take the wheel off, deflate and crowd the tire off starting opposite the valve, note how the tire is laced, cut the lacing and peel back the canvas covering the tube ends. Hold the tire with the foot opposite the laced portion, work each half of the tube loose in turn and remove it by the valve end, jerking a little but not too much.
- Inflate the tube no more than it is inflated inside the casing, immerse in water and stretch it to open small holes so leaks show as bubbles. On the road with no water, stretch the tube and pass it close to the cheek or near road dust to locate the escape.
- Gently scrape the tube for an inch round the leak, cut a sheet-rubber patch to the size of the scraped surface and clean one side. Apply rubber solution to both surfaces and let it dry from one to ten minutes until the benzine has evaporated, then press the two together, checking the tube is dry before it goes back in the casing.
- If the tube came out hard, shake a handful of powdered soapstone or French chalk through the casing first. Drop a weighted large soft string in, turn the casing so the weight carries it round, attach the string to the end of the tube away from the valve and draw it in without twisting, overlapping the ends eight or ten inches.
- Pull a loop of the tube out through the burst, slip a stick under to hold it, and patch in the regular way (Fig. 5). Crowd the tube back, partly inflate, bind with tire tape covering an inch or two beyond the cut each side, then finish inflating; a tire so repaired can be ridden a long distance.
- Begins the single tube section with the simplest temporary repair, good in nine cases out of ten for the rest of a trip: a small piece of chewing gum applied to the puncture and covered by a firm bandage of tape round tire and rim for at least an inch each side.
- A hole in the outer casing of a double-tube tire is patched with a single-tube patching plug. For a badly cut casing or one broken at the joint, slit the shoe on the under side, stitch up with a glover's needle using a baseball stitch deep through the canvas but not the rubber, and cement the outside with tube cement.
- The 1896 G. & J. tire is as before except for a wide stiffened flap protecting the air tube from being pinched or punctured by spoke joints and nipple heads, with the corrugations modified from three to five. Fitting instructions: seat the flap edge of the outer case in the rim first, insert the valve, lay the deflated air tube on the flap, then push the remaining edge under the flap into the rim.
- Inflate and find the puncture in the outer case by the slight hiss, without removing the wheel from the bicycle. Deflate at the valve, grasp the tire from the right side either side of the puncture and push with the thumbs to free the locking edge for a foot or two, the tire being lettered "Apply this edge last, and remove it first" on the left side, then draw the tire towards you and pull out the inner tube.
- Insert the valve stem in a bottle or glass of water, or wet the cap joint with soapy water or saliva, and turn the packing if bubbles occur, renewing it if worn. If the leak is where the valve joins the tube the valve washer is torn or the valve is not screwed tight; a blocked air passage or sticking check valve is cleared by unscrewing the bottom nut with a silver dime and cleaning the stem hole with twine.
- Describes the valve as a hollow brass stem with a check valve to hold the air while the pump is removed and a cap that permanently prevents escape. Also covers removing the tire without taking the wheel out (remove the left axle nut and spring the fork) and testing the partly inflated tube in a basin, stretching it with the fingers and marking and drying the leak before patching.
- Argues that riders who disregard the rules of the road cause most of the accidents charged to the bicycle, and that a horseman who failed to turn to the right could not complain of damages. Asks why cyclists should be permitted to dodge hither and thither, disconcerting drivers, riders and pedestrians, when wheelmen are credited with sound sense.
- A rider whose adjustment screw had bent hopelessly cut a piece of wood to size and shape, fixed it in the slot of the backstay to hold the spindle at the required length, and screwed up the spindle nut. The wheel ran for some weeks with that piece of wood holding it in.
- A shop-made puller with a three-eighths-inch screw and a six-inch welded handle, machine steel screws and nuts, best tool steel jaws that taper toward the top, and a Norway iron ring large enough to slip over the outside of the jaws. Its maker says it has ousted every crank brought to his shop and fits them all except the Victor.
- A second puller shown in a labelled sketch with a half-inch screw, a three-eighths-inch buggy clip and a loose washer bearing on the crank. The text says the sketch explains itself.
- C. C. Bostwick of Pataskala, O. sends a sketch of the tool he uses for removing cups from hubs, together with a section of a hub explaining how it works.
- A one-line endorsement of the 3 in 1 lubricant: having used it, the author finds it the best thing for the purpose intended, referring the reader to the advertisement.
Images in this book 103 pictures from 110 pages
Illustrations 9
 (opens in a new tab)
 To Straighten Forks. 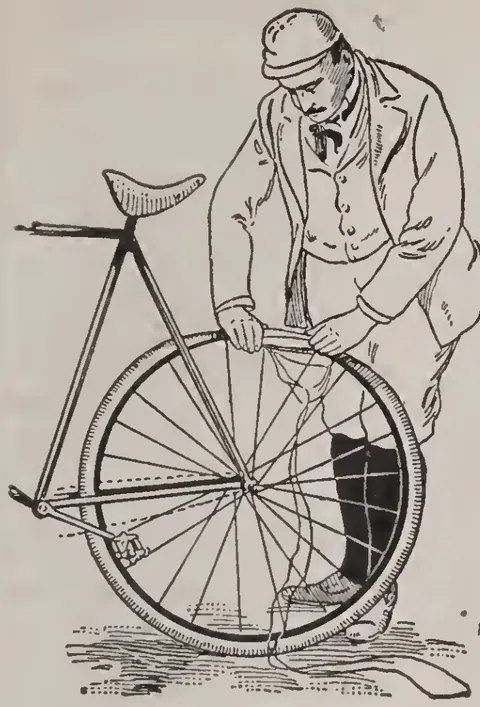 (opens in a new tab)
 Lacing a Tire Cover with a Canvas Strip. 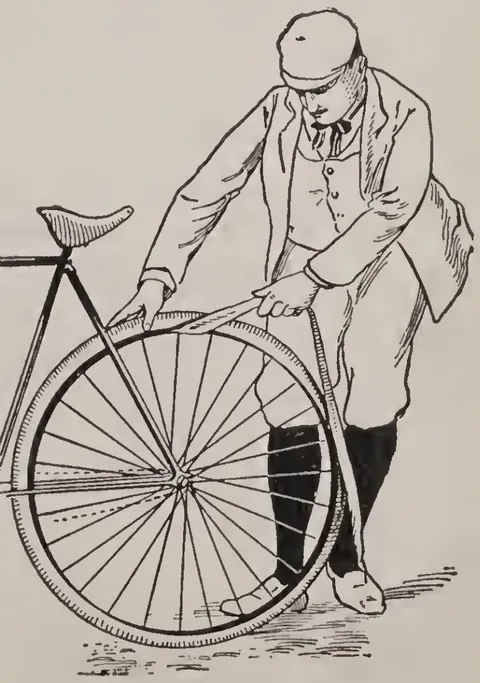 (opens in a new tab)
 Crowding an Inner Tube Off the Rim. 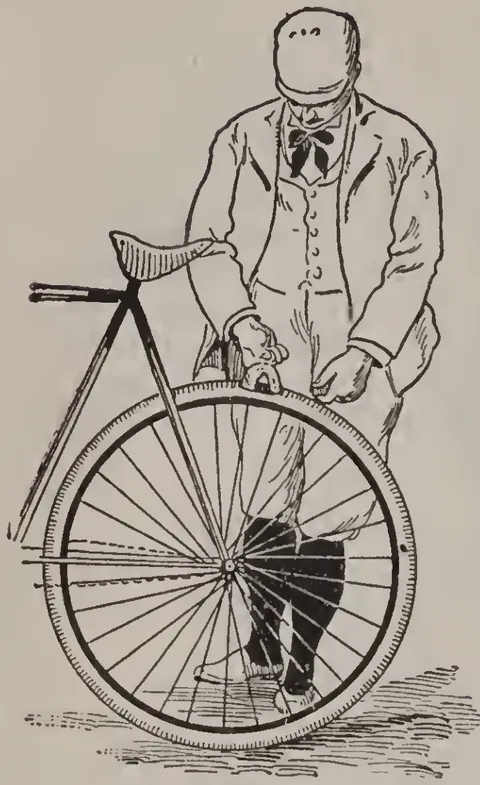 (opens in a new tab)
 To Repair Inner Tube Through Burst Casing.  (opens in a new tab)
 Pliers for Gripping the Plug Stem. 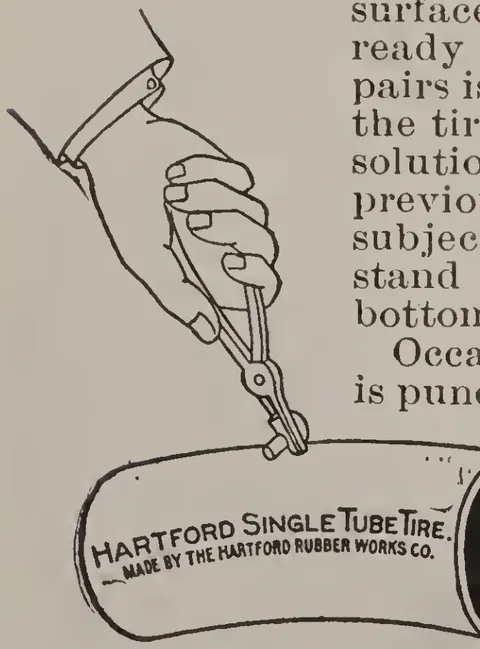 (opens in a new tab)
 Cutting Off the Plug Stem with Pliers. 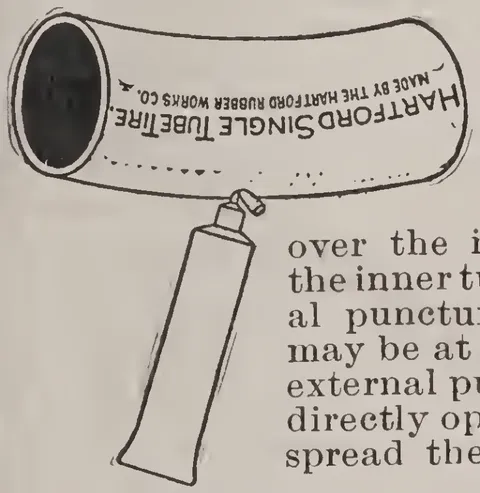 (opens in a new tab)
 Applying Solution to a Hartford Single Tube Tire. 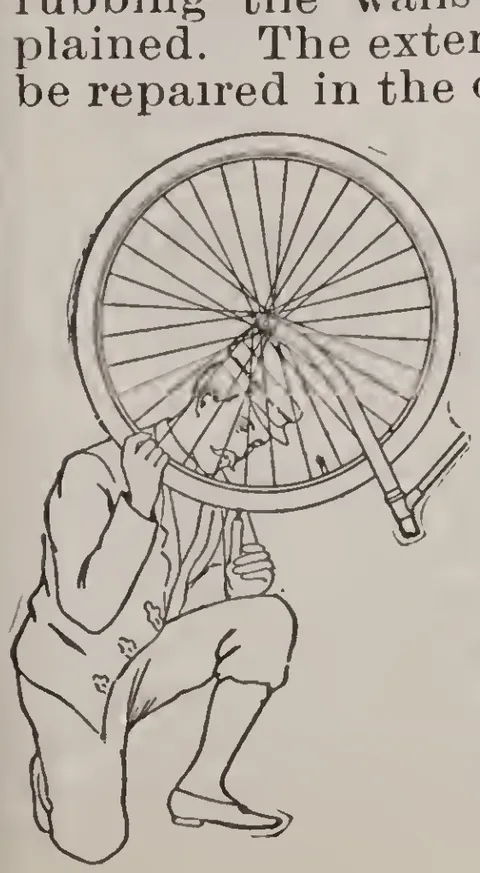 (opens in a new tab)
 Probing a Wheel for a Weak Spot. 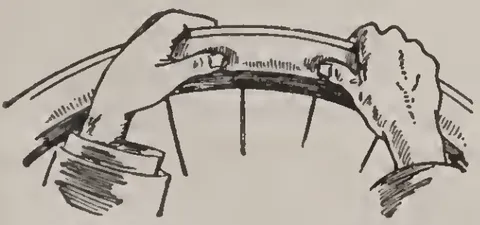 (opens in a new tab)
 Pushing the Tire's Locking Edge Free from the Rim.
Diagrams 70
 (opens in a new tab)
 Parts of the Bicycle. 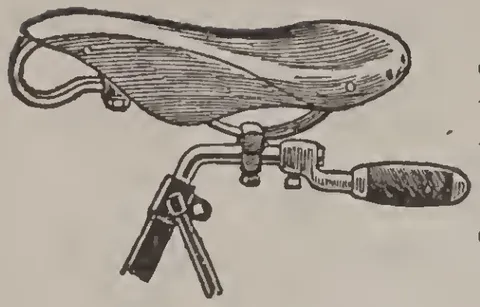 (opens in a new tab)
 A Bicycle Handle. 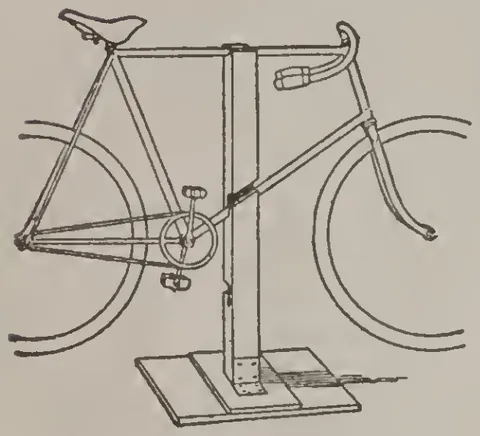 (opens in a new tab)
 A Bicycle Stand. 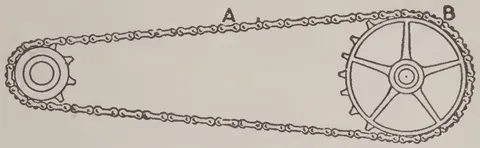 (opens in a new tab)
 To Join a Chain. 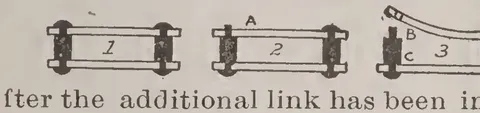 (opens in a new tab)
 Adding a Link to a Chain. 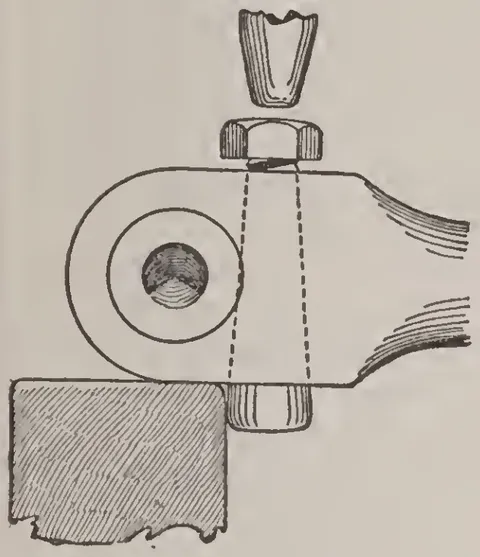 (opens in a new tab)
 Removing Crank Key. 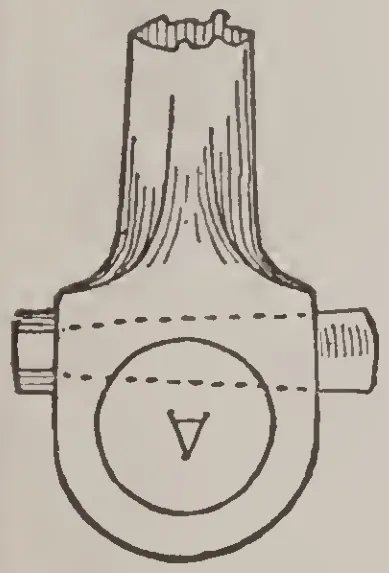 (opens in a new tab)
 Crank Tightener. 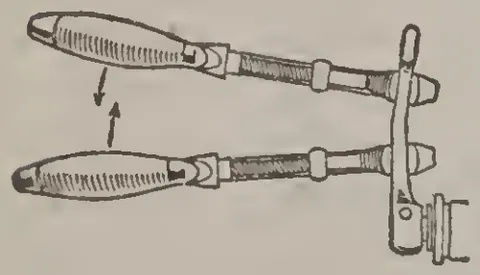 (opens in a new tab)
 Crank Straightener. 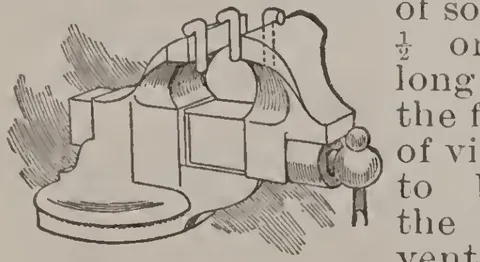 (opens in a new tab)
 Straightening Cranks, Pedal Pins, Etc. 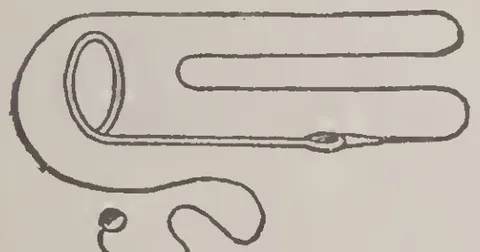 (opens in a new tab)
 Taking Out Inner Tubes. 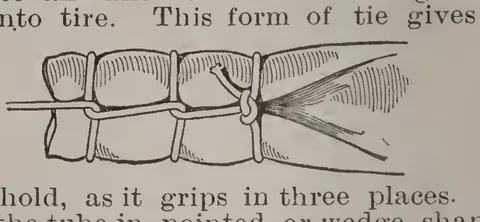 (opens in a new tab)
 Obstinate Inner Tube. 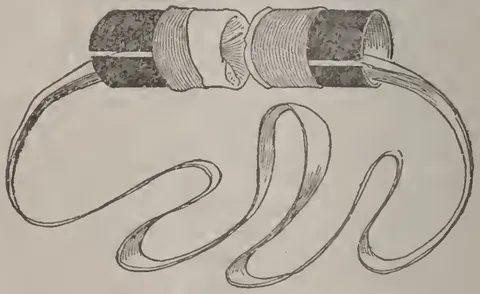 (opens in a new tab)
 Telescoping a Tube. 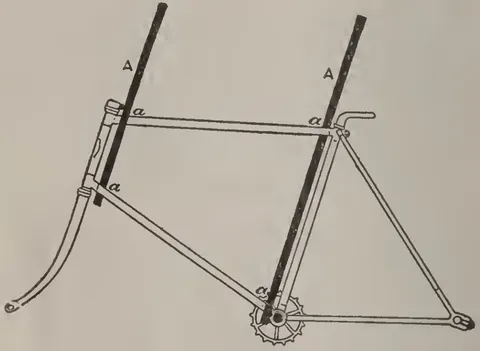 (opens in a new tab)
 To Straighten a Twisted Frame. 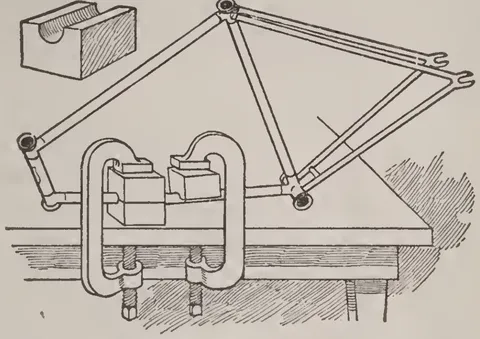 (opens in a new tab)
 To Straighten Short Bend in Frame. 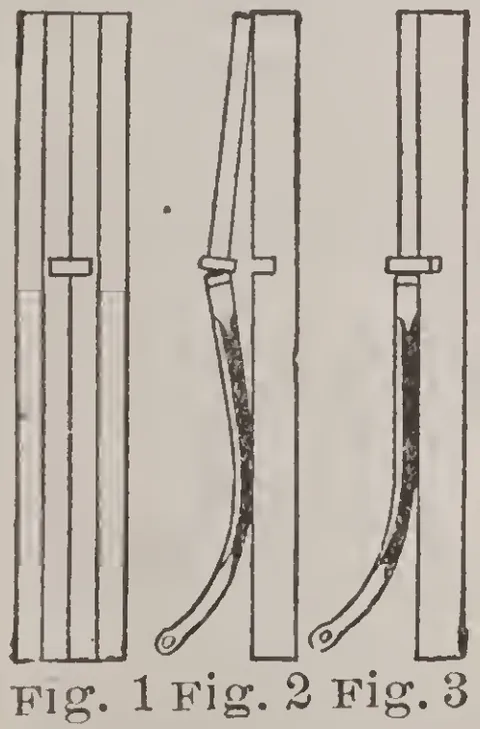 (opens in a new tab)
 Truing Front Forks. 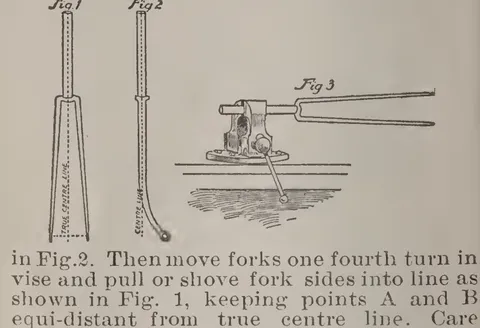 (opens in a new tab)
 Another Way of Truing Front Forks. 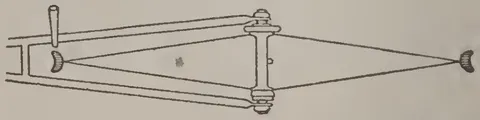 (opens in a new tab)
 Truing Up a Wheel. 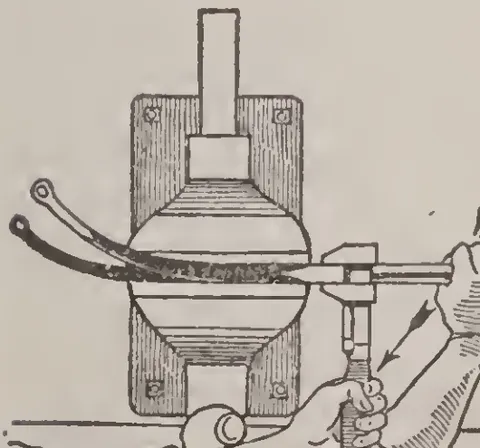 (opens in a new tab)
 To Straighten Forks (Vise Method). 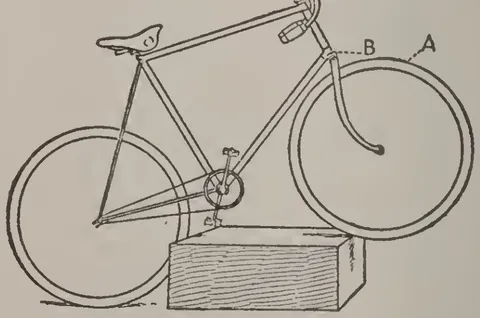 (opens in a new tab)
 To Straighten Front Fork Crown. 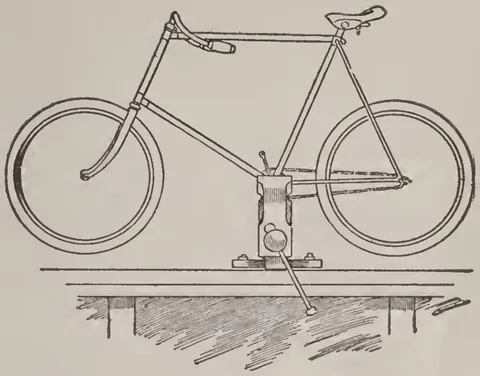 (opens in a new tab)
 Wheel Alignment on Stand. 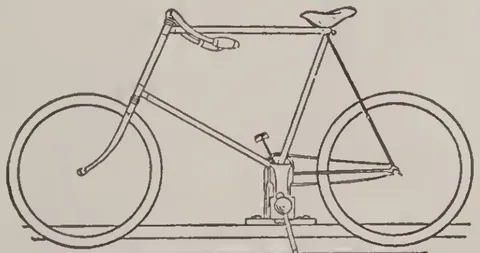 (opens in a new tab)
 When Both Bars are Thrown Over. 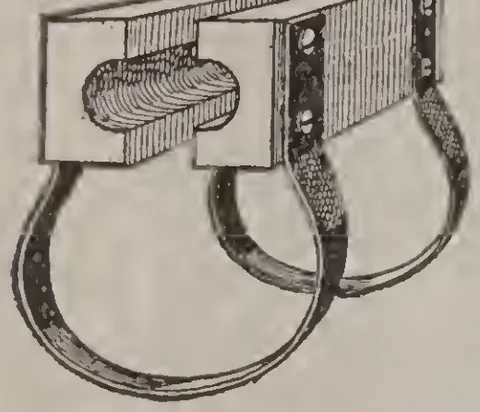 (opens in a new tab)
 Blocks for Straightening Tubing. 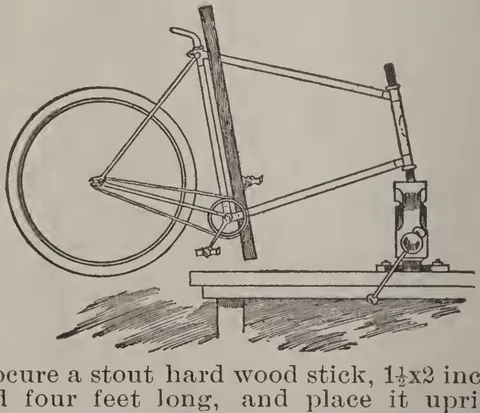 (opens in a new tab)
 To Line Up a Wheel. 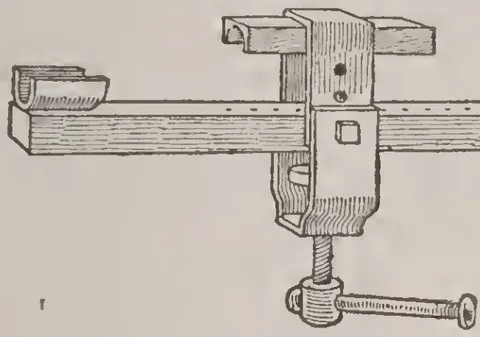 (opens in a new tab)
 Tube Straightener. 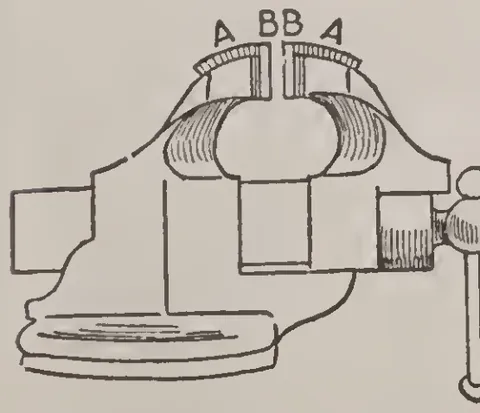 (opens in a new tab)
 Taking Bends Out of Handle Bars. 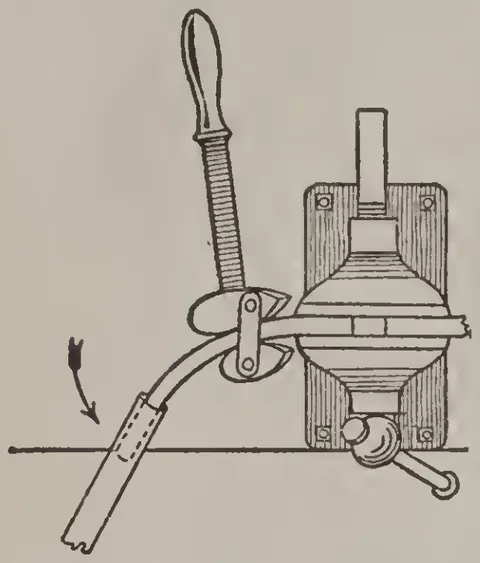 (opens in a new tab)
 Bending Handle Bars. 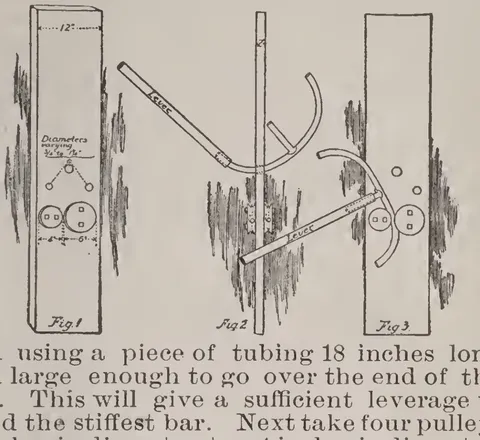 (opens in a new tab)
 To Bend Handle Bar. 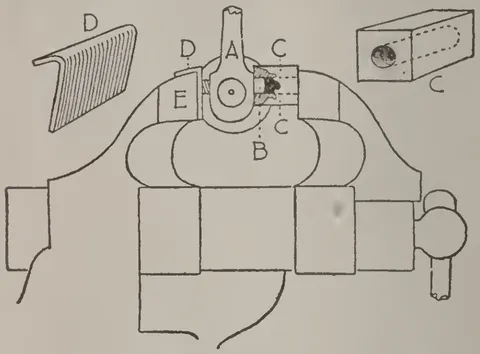 (opens in a new tab)
 Removing Crank Keys. 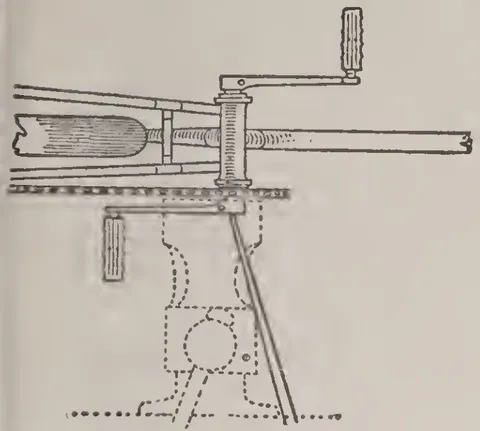 (opens in a new tab)
 Removing Tight Fitting Cranks. 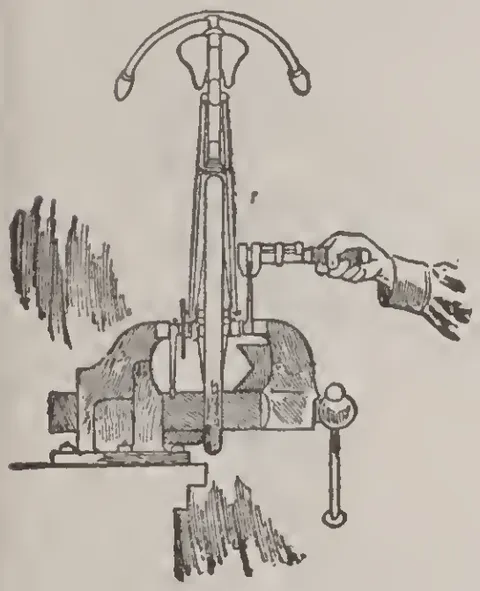 (opens in a new tab)
 Straightening Cranks. 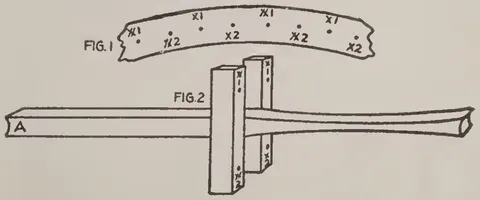 (opens in a new tab)
 Drilling Wood Rims. 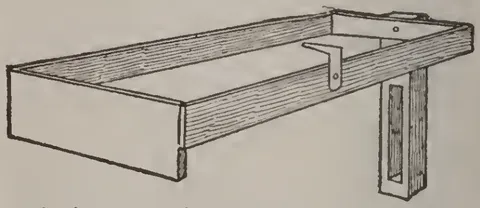 (opens in a new tab)
 Lathe Frame for Wood Rim Drilling. 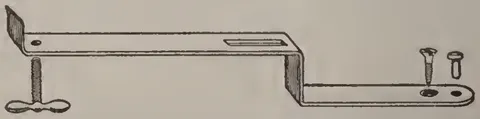 (opens in a new tab)
 Truing Up a Wheel. 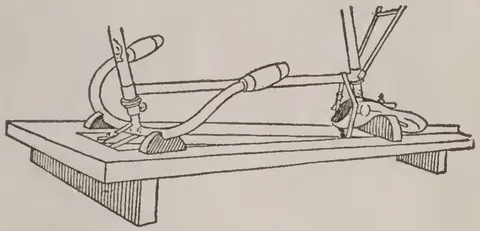 (opens in a new tab)
 Repair Stand. 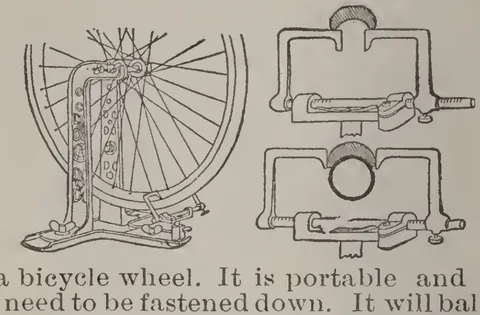 (opens in a new tab)
 Wheel Balancer and Repair Stand. 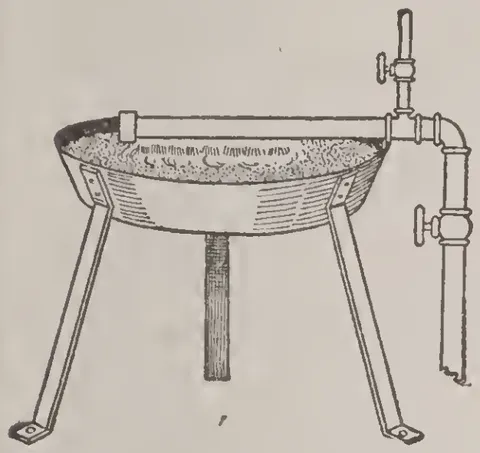 (opens in a new tab)
 A Good Gas Forge. 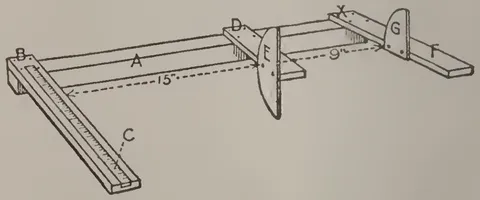 (opens in a new tab)
 Gauge to Try Front Forks. 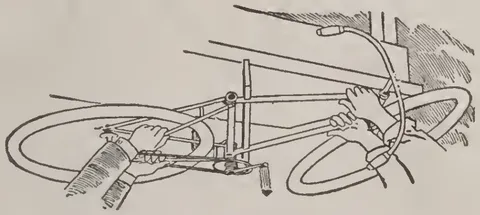 (opens in a new tab)
 Straightening Frames. 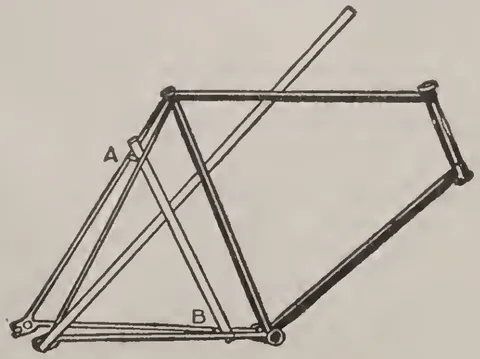 (opens in a new tab)
 Truing Rear Forks. 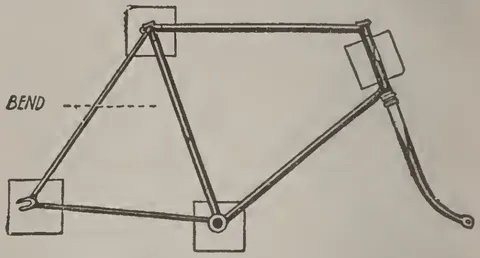 (opens in a new tab)
 Another Way to Straighten Bent Frames. 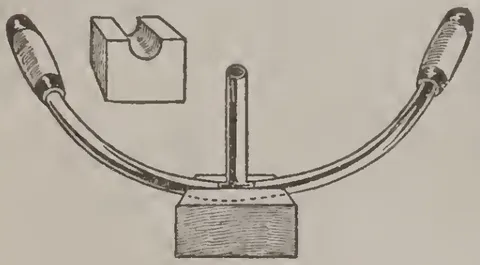 (opens in a new tab)
 Straightening Handle Bars. 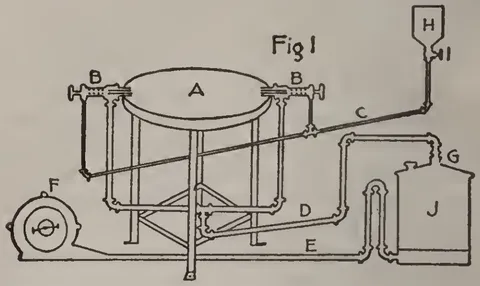 (opens in a new tab)
 Gasoline Brazing Furnace. 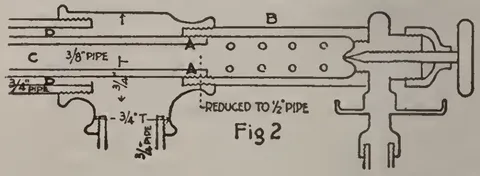 (opens in a new tab)
 Gasoline Brazing Furnace Burner Detail. 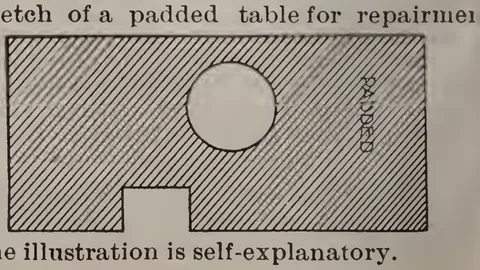 (opens in a new tab)
 Padded Table For Repairmen. 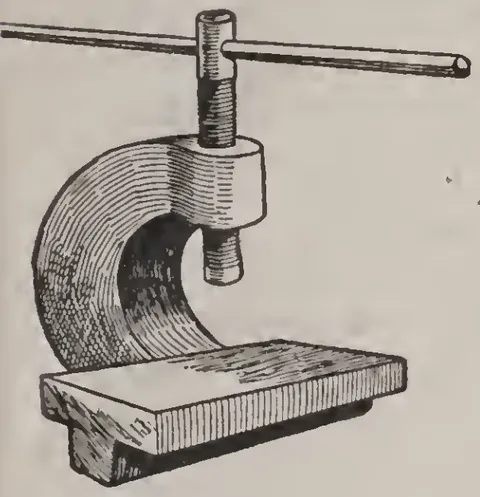 (opens in a new tab)
 Useful Press. 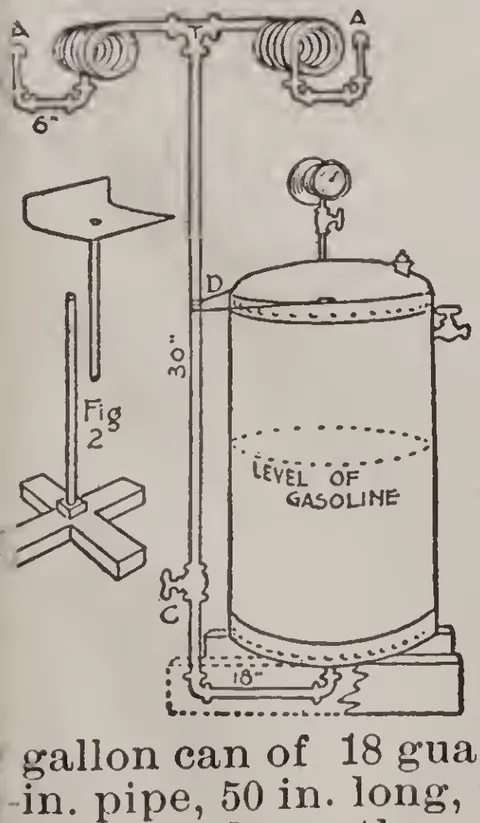 (opens in a new tab)
 A Brazing Furnace. 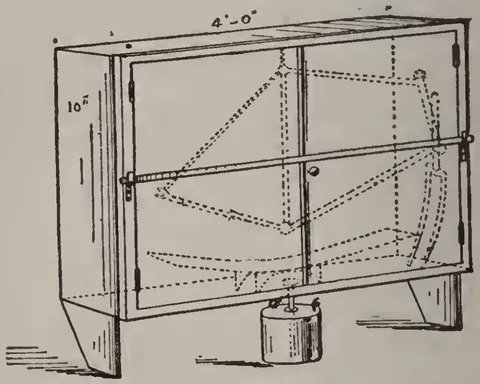 (opens in a new tab)
 Heating Oven. 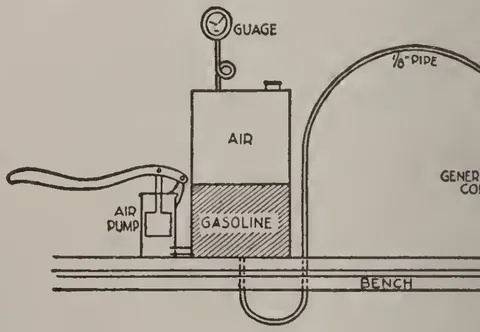 (opens in a new tab)
 How to Make a Good Brazier at Little Cost. 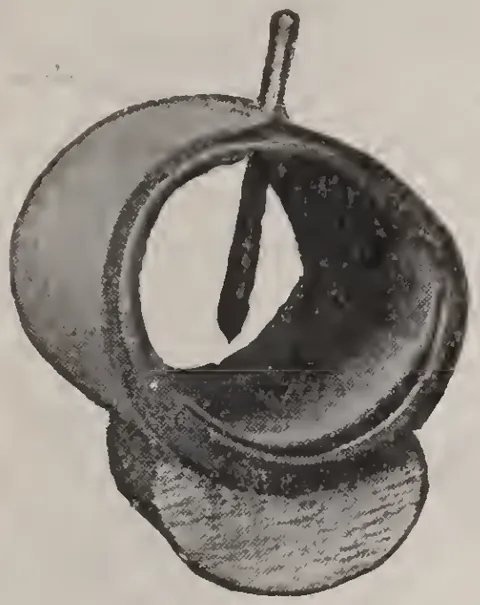 (opens in a new tab)
 No. 1. 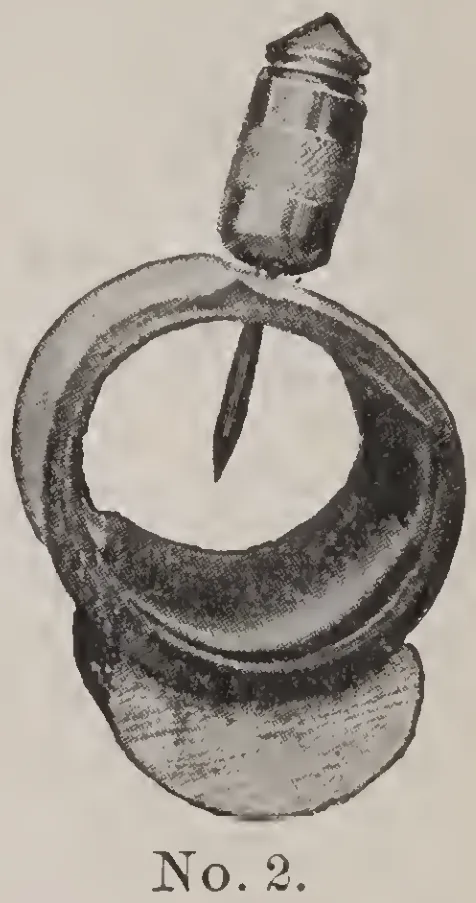 (opens in a new tab)
 No. 2. 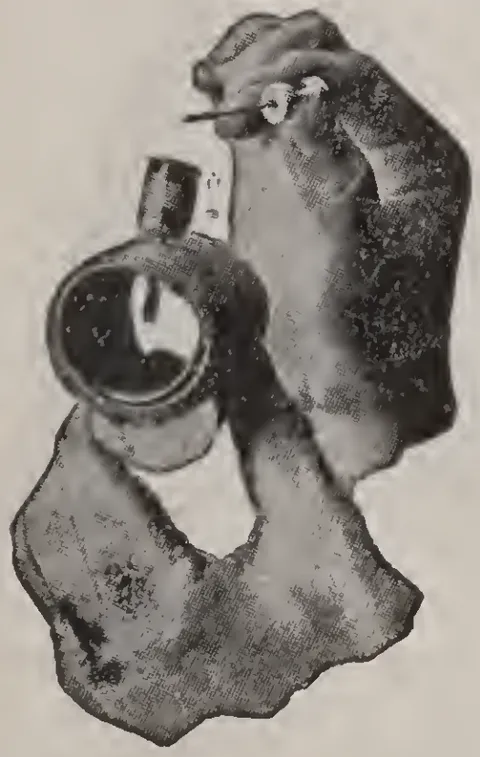 (opens in a new tab)
 No. 3. 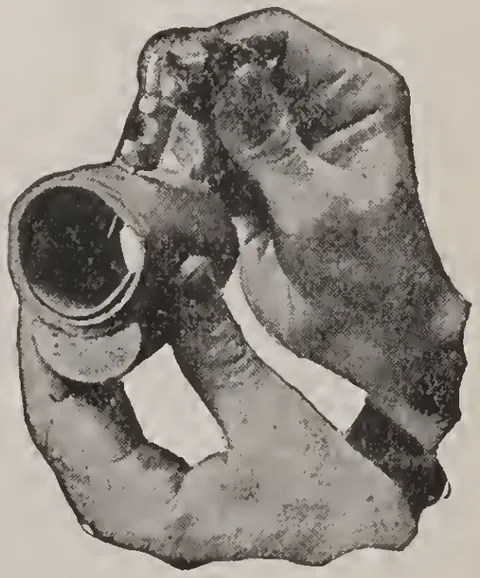 (opens in a new tab)
 No. 4. 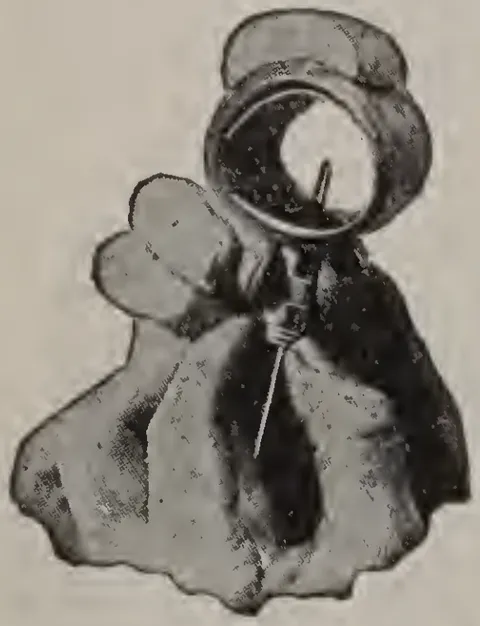 (opens in a new tab)
 No. 5. 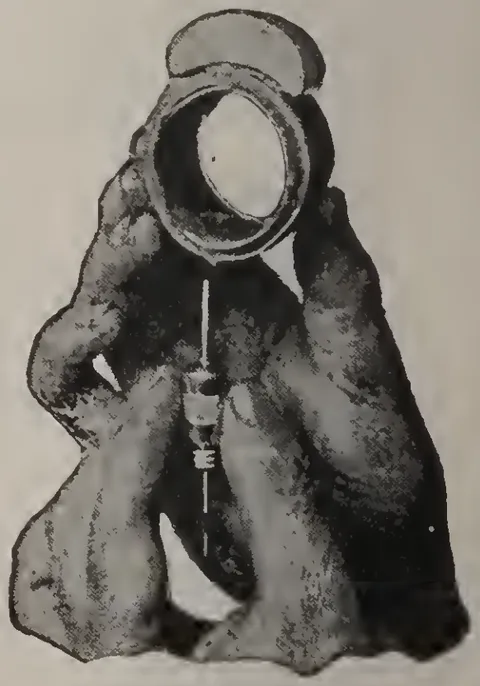 (opens in a new tab)
 No. 6. 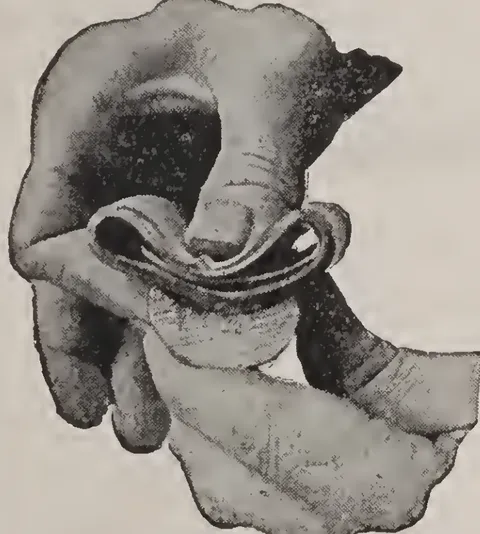 (opens in a new tab)
 No. 7. 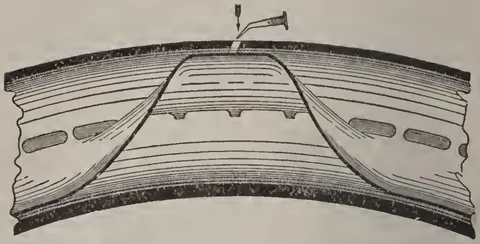 (opens in a new tab)
 No. 8 - Side view of repaired tire. 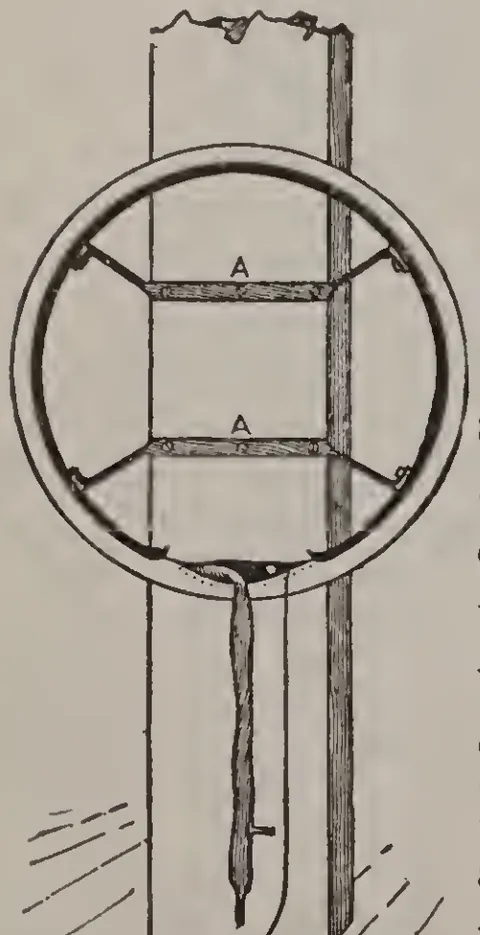 (opens in a new tab)
 A Convenient Stand. 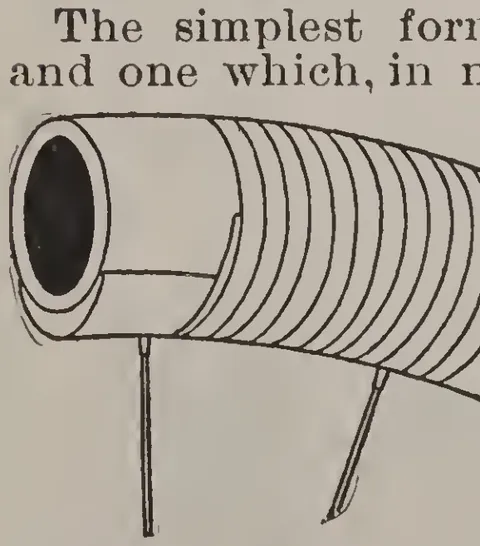 (opens in a new tab)
 Cross-Section of a Single Tube Tire. 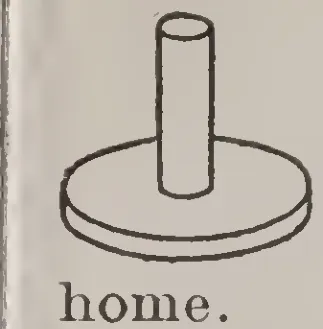 (opens in a new tab)
 Repair Plugs of Graduated Sizes. 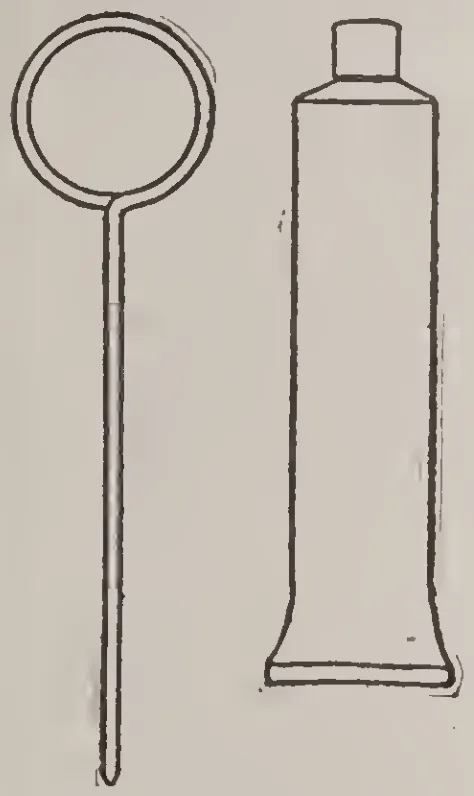 (opens in a new tab)
 Puncture Repair Tools: Loop Probe, Cement Tube and Brush. 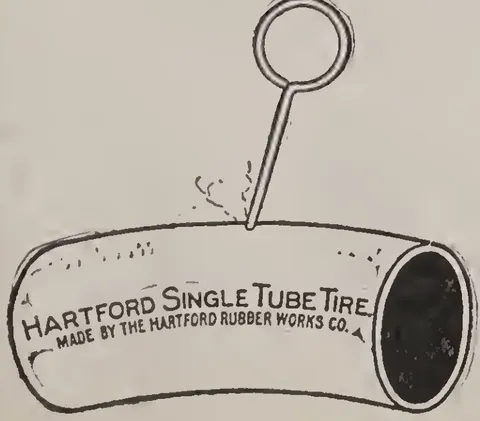 (opens in a new tab)
 Hartford Single Tube Tire, Cutaway with Plug. 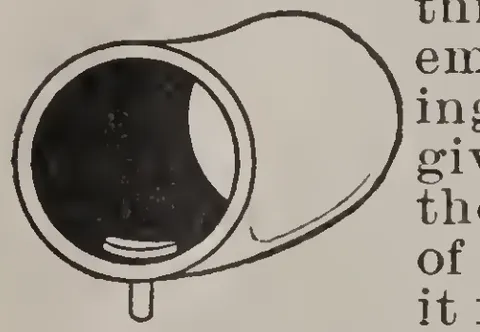 (opens in a new tab)
 Single Tube Tire Repaired with a Plug. 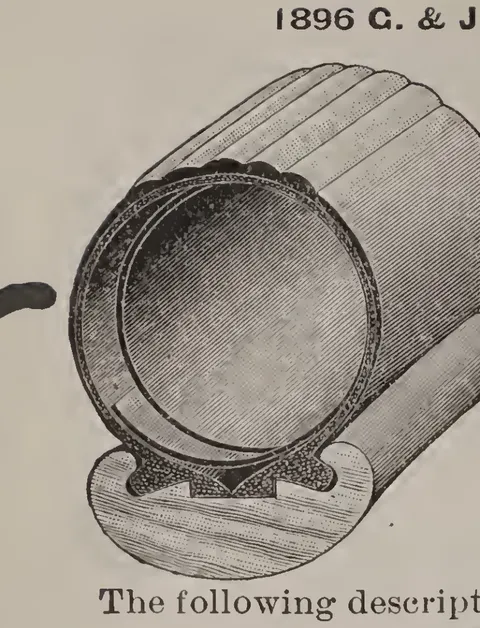 (opens in a new tab)
 1896 G. & J. Tire (Cross-Section). 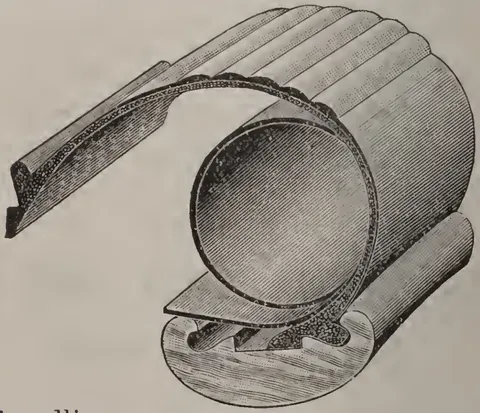 (opens in a new tab)
 Fitting the Air Tube Under the Flap of a G. & J. Tire. 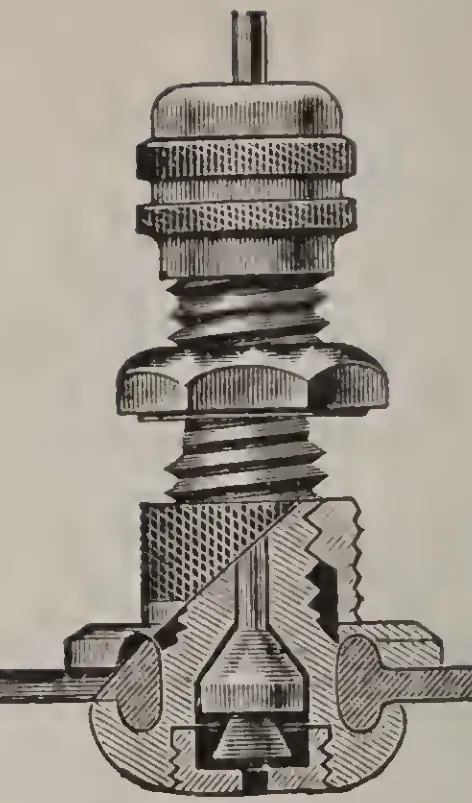 (opens in a new tab)
 A Bicycle Valve Stem (Cutaway). 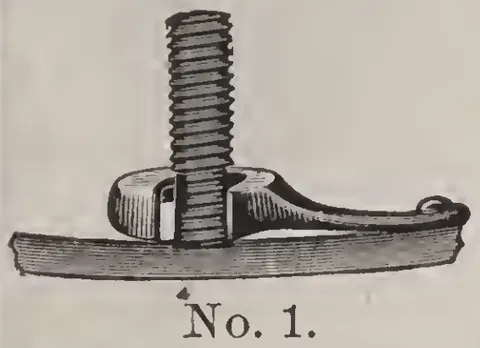 (opens in a new tab)
 No. 1. 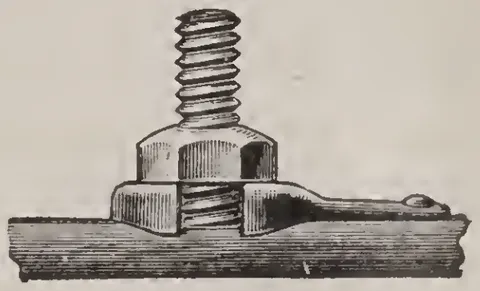 (opens in a new tab)
 No. 2. 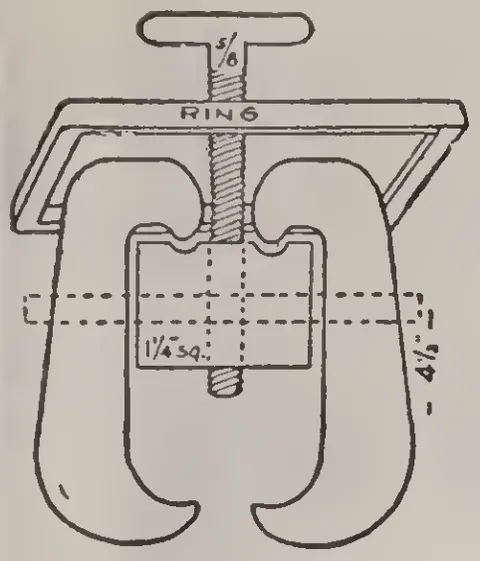 (opens in a new tab)
 A New Crank Puller. 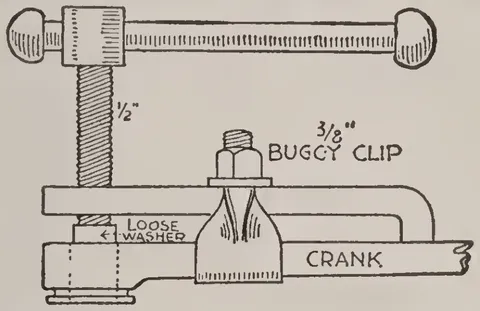 (opens in a new tab)
 Crank Puller. 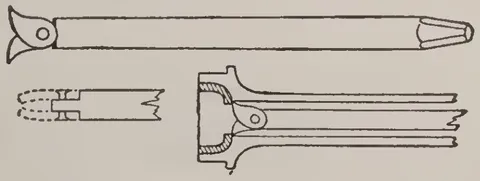 (opens in a new tab)
 Removing Cups.
24 advertisements
 (opens in a new tab)
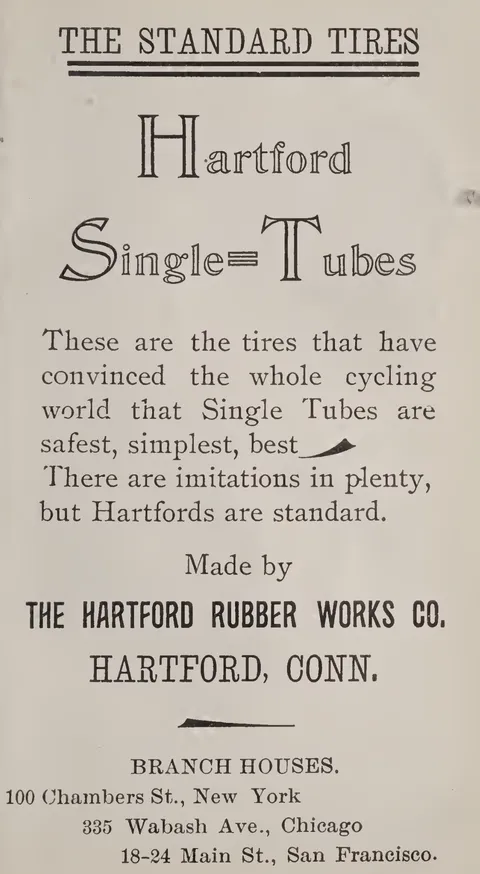
 Hartford Single-Tube Tires Advertisement. 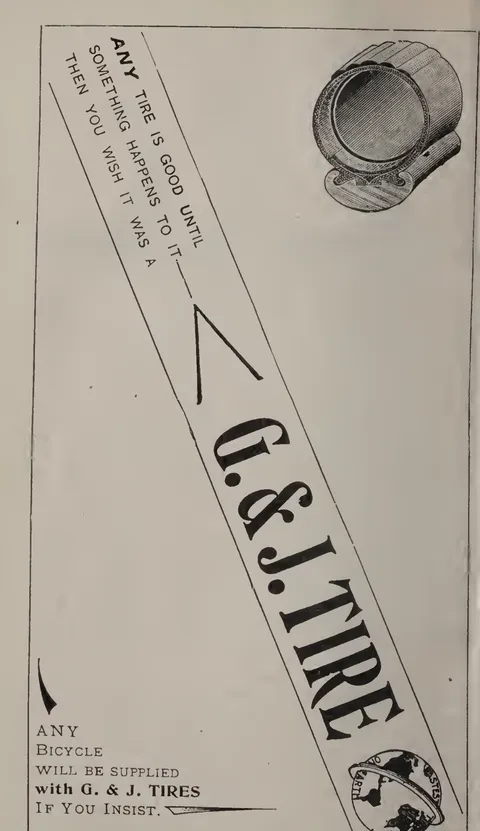 (opens in a new tab)
 G. & J. Tire Advertisement.  (opens in a new tab)
 The Orient Bicycle Advertisement. 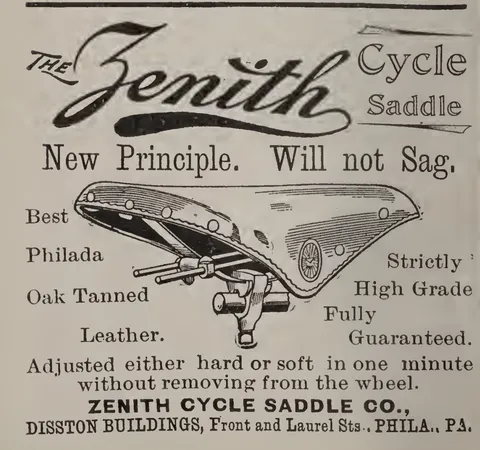 (opens in a new tab)
 Zenith Cycle Saddle Advertisement.  (opens in a new tab)
 Sterling Bicycles Advertisement.  (opens in a new tab)
 Ferracute Machine Co. Sheet-Metal Tools Advertisement. 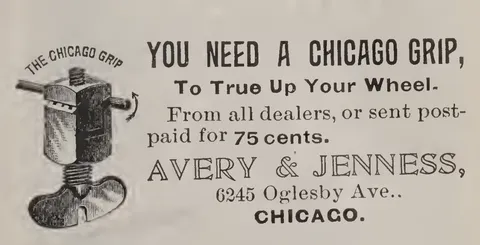 (opens in a new tab)
 Chicago Grip Advertisement. 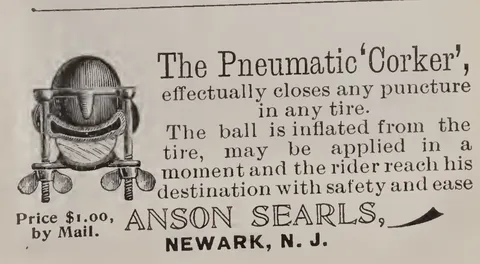 (opens in a new tab)
 Pneumatic 'Corker' Advertisement.  (opens in a new tab)
 Monarch Bicycles Advertisement. 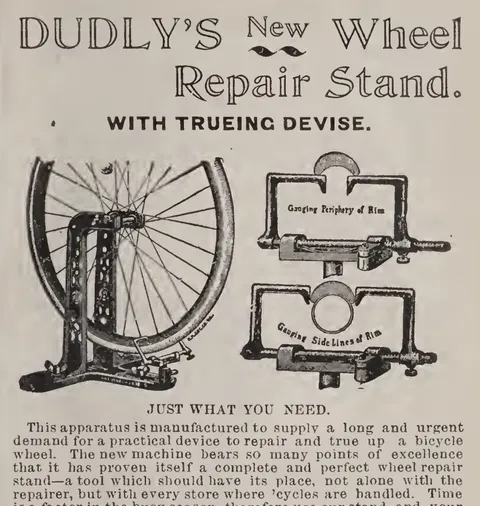 (opens in a new tab)
 Dudly's Wheel Repair Stand Advertisement. 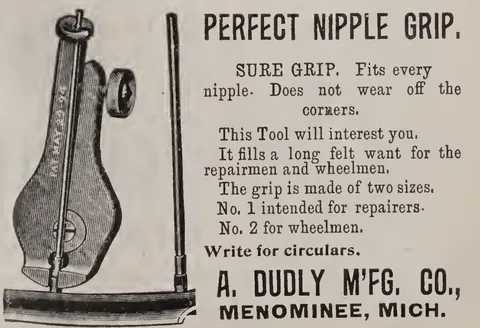 (opens in a new tab)
 Perfect Nipple Grip Advertisement. 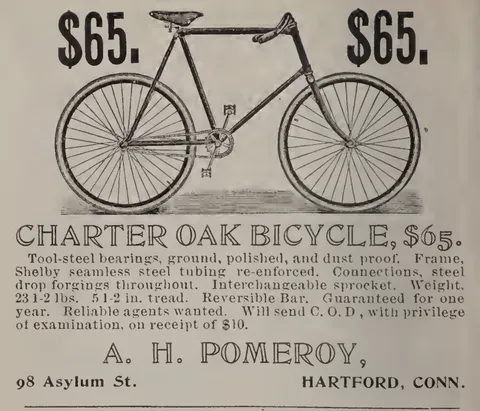 (opens in a new tab)
 Charter Oak Bicycle Advertisement. 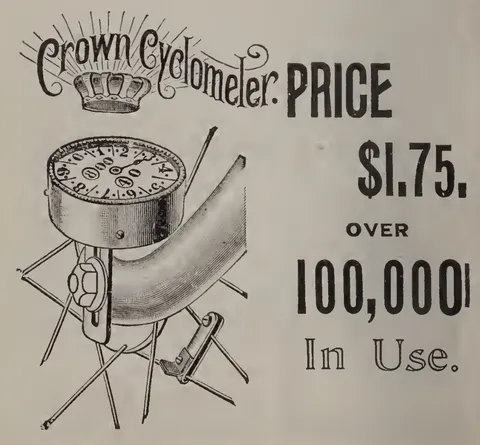 (opens in a new tab)
 Crown Cyclometer Advertisement.  (opens in a new tab)
 Whitehead & Hoag Lapel Buttons Advertisement. 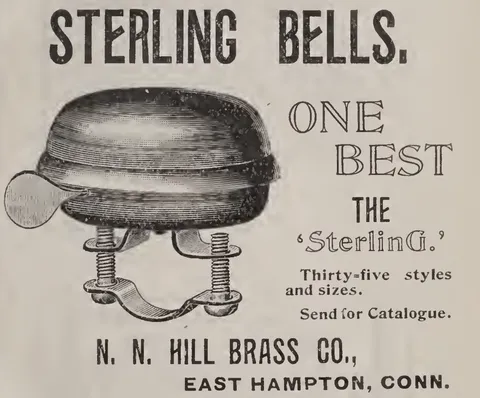 (opens in a new tab)
 Sterling Bells Advertisement.  (opens in a new tab)
 Excelsior Cement Co. Advertisement.  (opens in a new tab)
 United States Music Co. Piano Self-Instructor Advertisement.  (opens in a new tab)
 United States Music Co. Instrument Advertisement.  (opens in a new tab)
 Pony Premo Camera Advertisement.  (opens in a new tab)
 Levy Cycle Clock Advertisement.  (opens in a new tab)
 Trenton Cyclometers Advertisement. 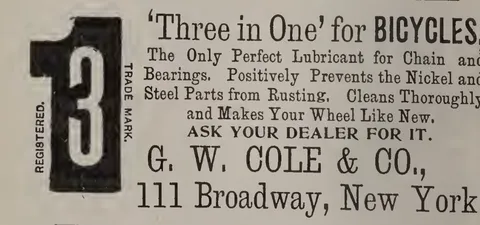 (opens in a new tab)
 'Three in One' Lubricant Advertisement. 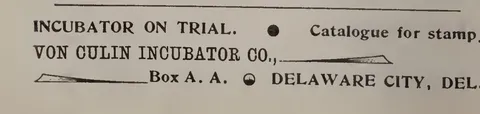 (opens in a new tab)
 Von Culin Incubator Co. Advertisement. 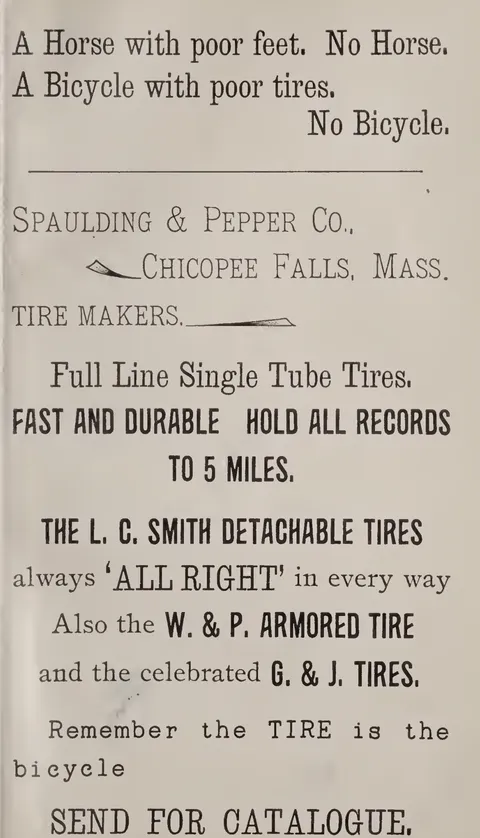 (opens in a new tab)
 Spaulding & Pepper Co. Tire Advertisement.